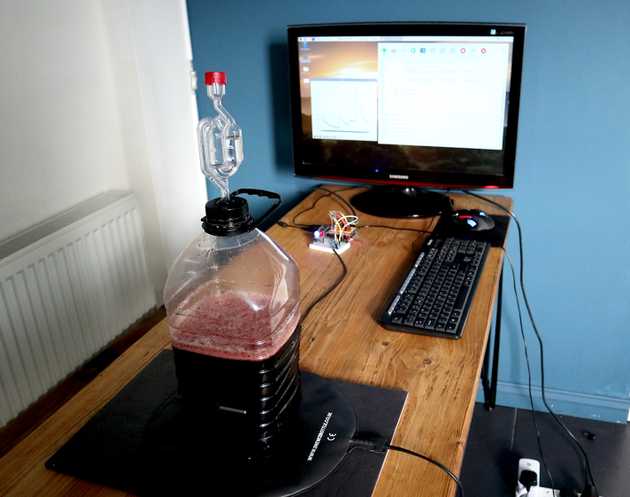
Homebrewing wine is a hobby I picked up a few years ago. I’ve been using wine making kits that are easy to use; follow the recipe, add the ingredients and wait 7-10 days for (hopefully) tasty wine.
An issue that I’ve encountered on several occasions was fermentation taking a long time to start, or in some cases stopping completely, due to the temperature dropping. Depending on what advice you read, recommended temperature for fermentation is somewhere between 20-30°C. Fine if you’re in a nice sunny country. Scotland, not so much.
I saw some commercially available options online, such as heat insulation jackets or temperature controlled heating belts for placing around the vessel. Other suggestions included leaving the barrel in the sink/bath with hot water to activate the fermentation process. Good idea, however a bit impractical.
I thought this was an ideal opportunity to dust off an old Raspberry Pi I had sitting in the back of my desk drawer and put it to good use - the Raspbrewy Pi project was born.
Problem
I needed a solution which could:
- Measure the temperature of the wine (or kombucha)
- Check if the reading was above a target temperature
- Trigger the heating element if the reading dropped below the target
- Switch off the heating element if the reading was above the target
- Repeat this process
Equipment Used
- Raspberry Pi (Model 2 B V1.1)
- CamJam Edukit #2 Sensors / Thermometer / Breadboard / Wires
- Energenie ENER002-2PI Remote Control Sockets with RPi Transmitter
- RPI GPIO Expansion Board
- Heating Pad with mains power lead
Getting Started
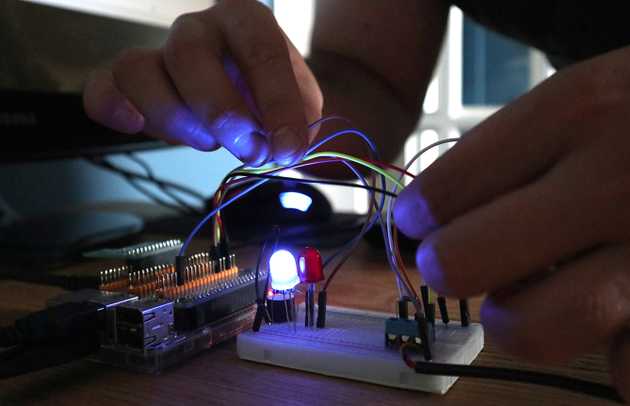
I initially setup the Raspberry Pi and connected the breadboard, resistors, thermometers and LEDs following instructions from the CamJam EduKit2 worksheets:
Pi-mote Control Sockets and Heating Pad
Once the Raspberry Pi was able to measure temperature with the thermometer and control the LEDs, it was time to move onto automating the heating pad.
My initial thought for controlling the heat pad switching was to use some sort of smart plug. I discovered that Energenie make ‘Pi-mote’ remote controlled sockets and a controller board designed for Raspberry Pi.
I attached the Pi-mote controller board to the GPIO Expansion Board on the Raspberry Pi and downloaded the python code supplied on the Energenie website. This initialised the GPIO pins and provided examples for sending the on/off signals to the sockets.
The heating pad was then plugged into the socket and capable of switching on/off upon receiving the relevant signal.
Coding
The first working version was one python file containing all of the imports, GPIO setup and while loop controlling the automation. It worked, but it needed some improvement. Revisiting this project almost 18 months later was a nice reminder of the progress I’ve made in learning programming. I refactored the code, separating the different functionality into their own modules.
Graphing
I used MatPlotLib to output a simple graph of the temperatures and time to the display. Each iteration of the loop plotted a point on the graph. This gave me a quick visualization of the temperature range.
File Handling
The current version of Raspbrewy Pi (v1) saves the temperature log and a timestamp to a CSV file. Simple, but I can match the entries against the graph to check when there are any particularly large variances in temperature.
Future Versions
I’m happy with how the Raspbrewy Pi works just now, however I’ve been thinking about some ways I could improve on the project in the future:
- Smartphone UI for controlling start/stop
- Refactor to implement State design pattern
- Improve file handling and incorporate some data analysis
- Expand the graphing capabilities
Notes
I’m still a novice at winemaking - this was more focused on learning about Raspberry Pi automation and building a project to solve a ‘real life’ problem. Suggestions are more than welcome for improving my winemaking though!
Also, I’ve only run this for a relatively short amount of time, just to get the fermentation process started. When I get around to working on version 2, I’ll test running the Raspbrewy Pi for a longer period of time and report back the results.
Thanks for reading!
Code for the project is available at: Raspbrewy Pi Github Repository


